The Famous Exploding Plesiosaur
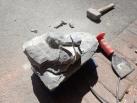
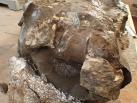
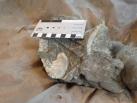
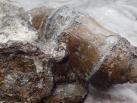
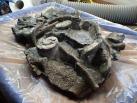
Back in the beginning of 2017 David Savory found a septerian nodule which is full of bones. He recognised them as those of a plesiosaur. The nodule was very heavy, and he called Darren Withers for help in getting it back to his car, which is much further away when burdened with many kilos of rock than when strolling around for a bit of gentle collection. With the help of a wheelbarrow they got it back to the car, but it was impossible to move it without breaking it along the lines of weakness caused by calcite veins within the nodule.
It was obvious from the start that this is an exceptional specimen representing a lot of bone material, but that it would be a very challenging job to prepare it because of the hardness of the nodule, and the stresses frozen in during the process of fossilisation which would make it prone to crack and shatter.
David asked if I would undertake this rather challenging task and (perhaps rather rashly in retrospect) I agreed.
So this is where the story begins.
Contents
- 18th June 2017 - Getting Ready
- 18th June 2017 - Reducing the blocks
- 20th June 2017 - Reducing Block B
- 22nd June 2017 - End of Phase 1
- 28th June 2017 - Preparing for the cradle
- 30th June 2017 - Phase 2 - Things get messy
- 4th July 2017 - Starting to remove matrix
- 14th July 2017 - Block A
- 20th August 2017 - Back to the workshop
- 21st August 2017 - Block C
- 22nd August 2017 - Slow progress
- 17th October 2017 - Back to work
- 17th October 2017 - Progress
- 18th October 2017 - Progress
- 19th October 2017 - Progress
- 21st October 2017 - Progress
- 22nd October 2017 - Progress
- 23rd October 2017 - A bit more ...
- 23rd January 2018 - Slow progress
- 7th June 2018 - Back to work
- 12th November 2018 - Preparing the underside of Block B
- 4th February 2019 - Working on the underside
- 6th February 2019 - More details
- 12th February 2019 - Details of ammonite
- 10th March 2019 - Some notes on progress and preparation
- 17th April 2019 - More ammonites
- 16th May 2019 - Getting there
- 3rd May 2020 - Back to work
- 5th May 2020 - Assembling the nodule
- 7th May 2020 - Joining the blocks
- 9th May 2020 - 9th May 2020
- 23rd May 2020 - Preparing for mounting
- 25th May 2020 - Preparing for mounting
- 26th May 2020 - Mounting the Specimen
- 31st May 2020 - Mounting the last block
Getting Ready
18th June 2017
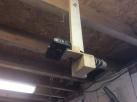
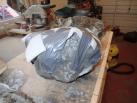
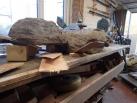
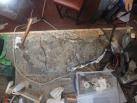
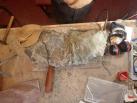
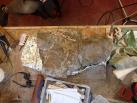
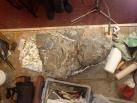
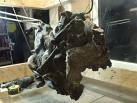
The first stage of preparation is to set up the work area. I have the basics set up in my workship already, and added a stand to hold a camera set above the work area so that photographs can be taken of the specimen during the prepartion from the same point.
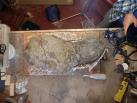
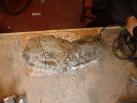
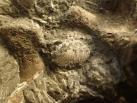
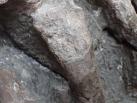
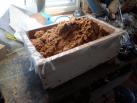
Reducing the blocks
18th June 2017
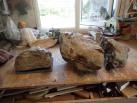
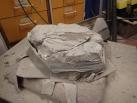
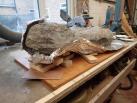
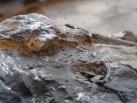
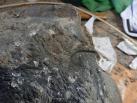
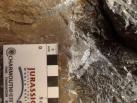
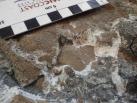
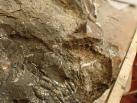
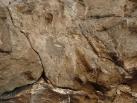
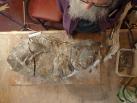
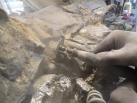
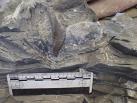
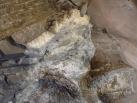
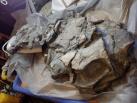
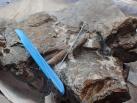
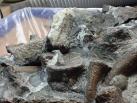
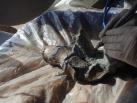
Although a few scattered bones are associated with the specimen, most of it is in a large nodule which has been broken into three sections. All visible bones are in the upper half of the nodule. To reduce the weight and to make the sections easier to handle a lot of the matrix from the underside is removed.
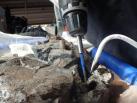
This is done by using an angle grinder to cut groves so that bigger chunks can be broken off using hammer and chisel.
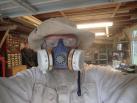
The nodules are heavy, and any exposed bone liable to be damaged if the weight rubs against it. A rough coat of thick paraloid applied to any exposed bone protects it from damage, and any work in the underside is done with the workpiece suported by a rubber pad or blanket.
This is a very messy process which creates a lot of fine dust, so dust masks are essential
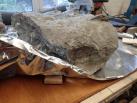
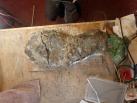
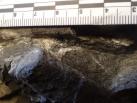
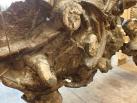
Reducing Block B
20th June 2017
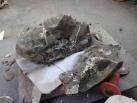
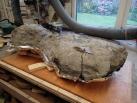
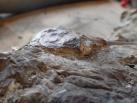
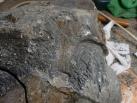
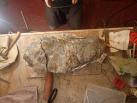
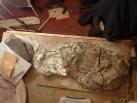
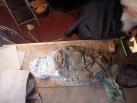
This is much the heaviest of the three blocks, and additional protection is added to the bone surface. To make it easier to move around it is placed on a wheeled trolley with a blanket as additional padding.
Reduction is by cutting groves using an angle grinder, then a light tap with a bolster and hammer to break off a section of the matrix. Unfortunately stellarated nodues such as this can fracture unpredictably: you can hit them with a sledgehammer and nothing happens, but at other times a light tap with a hammer can break them into fragments.
In this case, a light tap with the hammer caused the block to split into three parts. Following some very unscientific language, I coated the newly exposed bone with thick paraloid and reassembled the block, holding it togther by wrapping it in duct tape. I did some more work in the block to reduce its thickness and provide a more or less flat underside, but not as much as I had originally intended given its fragility.
When the block is turned over it will be possible to minimise the appearance of the fractures by ensuring that they are accuarately alligned. This is a problem which might have been anticipated but not a disaster.
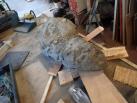
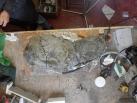
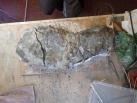
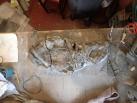
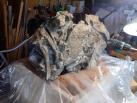
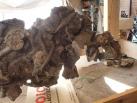
End of Phase 1
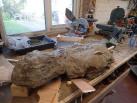
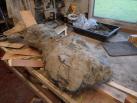
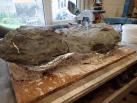
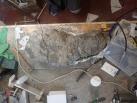
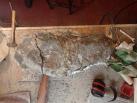
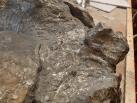
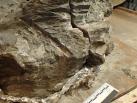
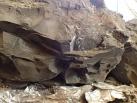
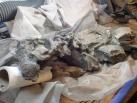
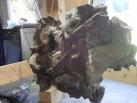
22nd June 2017
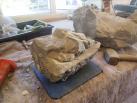
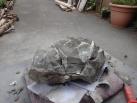
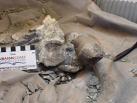
The third of the block is now reduced and the pieces assembled into their original configuration. The highly irregular shape of the nodule can now be clearly seen. The next stage will be to make a solid frame to hold the pieces in place so that the actually preparation can start.
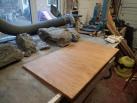
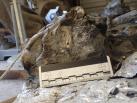
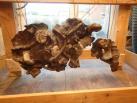
Preparing for the cradle
28th June 2017
Not much progress over the past couple of days due to other demands on my time!
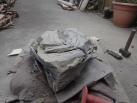
The blocks need to be held firmly in place for preparation, but in such a way that individual blocks can be removed if airbrasion is needed. This is in part because of the weight of the whole specimen, in part because of limitations in size imposed by my airbrasive cabinet.
The specimen is on a base of 18mm ply which has been sealed with varnishe to reduce the chances of its delaminating. Depending on how it is to be displayed, it may be there for a long time. A layer of foil prevents the blocks sticking to the casting agent so that they can be removed.
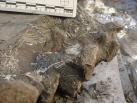
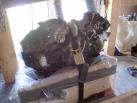
Phase 2 - Things get messy
30th June 2017
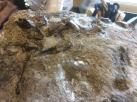
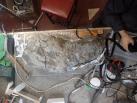
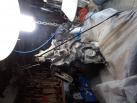
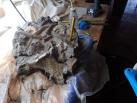
With the blocks of the nodule aligned, the next stage is to make sure that they can't move when being prepared. Strips of hessian soaked in Jesmonite are used to fill in gaps under the blocks and cover the wooden wedges used to adjust alignment. This is a rather messy process!
Jesmonite is a casting material and is used because it is much stronger than plaster. This marks the end of Phase 2. The specimen is ready for the airpen at last!

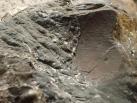
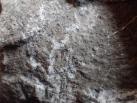
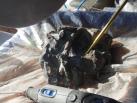
Starting to remove matrix
4th July 2017
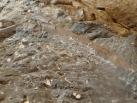
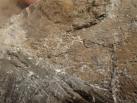
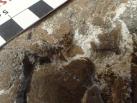
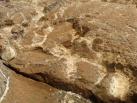
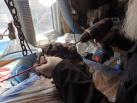
Initially this is more of an exploration of the nature of the matrix in different parts of the nodule. Some of the surface material is formed of compacted shells and can be removed very easily.
The matrix is variable in its nature. In some parts it is relatively soft, and can be penned off quickly and easily. In other parts it is pyritic, and very hard. Working this with the pen is a slow and laborious business, and other methods are needed to remove matrix relatively quickly. Cutting parallel grooves with a cutting disc on a Dremel handset, then using a chisel to break out the segments in between works well, but has to be done very cautiously to avoid cutting into bone. When working with the airpen, the metrix generally spalls away from the bone when the tip gets close. It involves moving the tip towards the bone in minute increments until a flake spalls off, applying as little pressure to the pen as possible. If you try to force it, there is a risk of hitting the bone and leaving tell-tale pits.
Block A
14th July 2017
After an hiatus because I dropped my airpen and snapped off the tip, and I needed to clear workshop space to repair an umbrella for my daughter, back to work. I've started to use one of Ken Mannion's TT pens which is rather more powerful than the TN pen I was using previously because of the hardness of the matrix. This makes it a bit more tricky when approaching bone, but speeds the process up.
Some of the matrix spalls cleanly from the bone, but in other parts it is hard tofind a distinct boundary between bone and matrix. This suggests bioerosion of the bone when the carcase was lying on the sea floor
Back to the workshop
20th August 2017
There has been a bit of an hiatus in the preparation, partly because I have spent time preparing nodular material from an ichthyosaur, and partly because of the demands on my time through work and personal matters.
Getting back to the specimen, I've shifted the focus of the work to block C (on the left side of the progress photos) where it looks as if there are bones from the girdle.

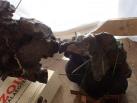
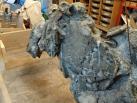
Block C
21st August 2017
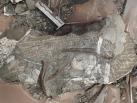
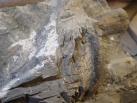
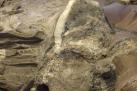
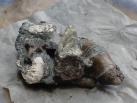
A fairly short session, concentrating on the scapula and coracoid emerging from Block C. This is trick work: in many places there is no clear separation of bone from matrix, which makes progress very slow. Some of the bone appears to be badly degraded, and is rather powdery and unconsolidated so I'm hanging fire on how to approach those parts while I decide what to do. It doesn't seem porous enought to soak up a consolidant, but perhaps If i use a very dilute solution of paraloid in acetone and repeat seval times it will do the trick.
Slow progress
22nd August 2017
Another rather short session. This is rather demanding work! Another bone has appeared on Block C which looks like a rib. It is very friable, and I have consolidated it and other fragile areas with a coating of paraloid. It's all looking very messy.
Back to work
17th October 2017
After a long hiatus, work starts again!
There has been a problem with my compressor. It failed, the supplier arranged to have it collected for repair, the courier lost it, and it has now been replaced by the supplier with a new one.
So it's back to the workshop.
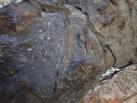
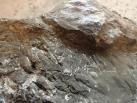
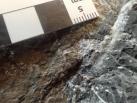
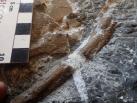
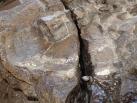
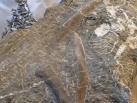
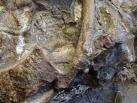
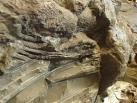
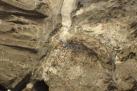
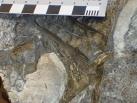
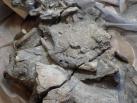
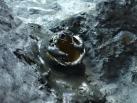
The nodule is rather fractured as I get deeper in and expose more of the bone, and flakes have spalled off containing bone fragments. Because there seems to be lot of stress frozen into the nodule, the flakes don't fit back exactly as they are slighly deformed relative to their previous state.Where this has happened I've glued them back in place with paraloid so that when the preparation has progressed much further I can reposition them in a more permanent way.
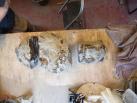
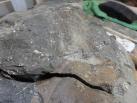
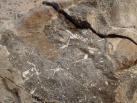
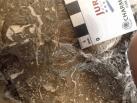
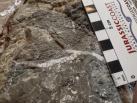
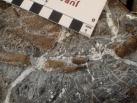
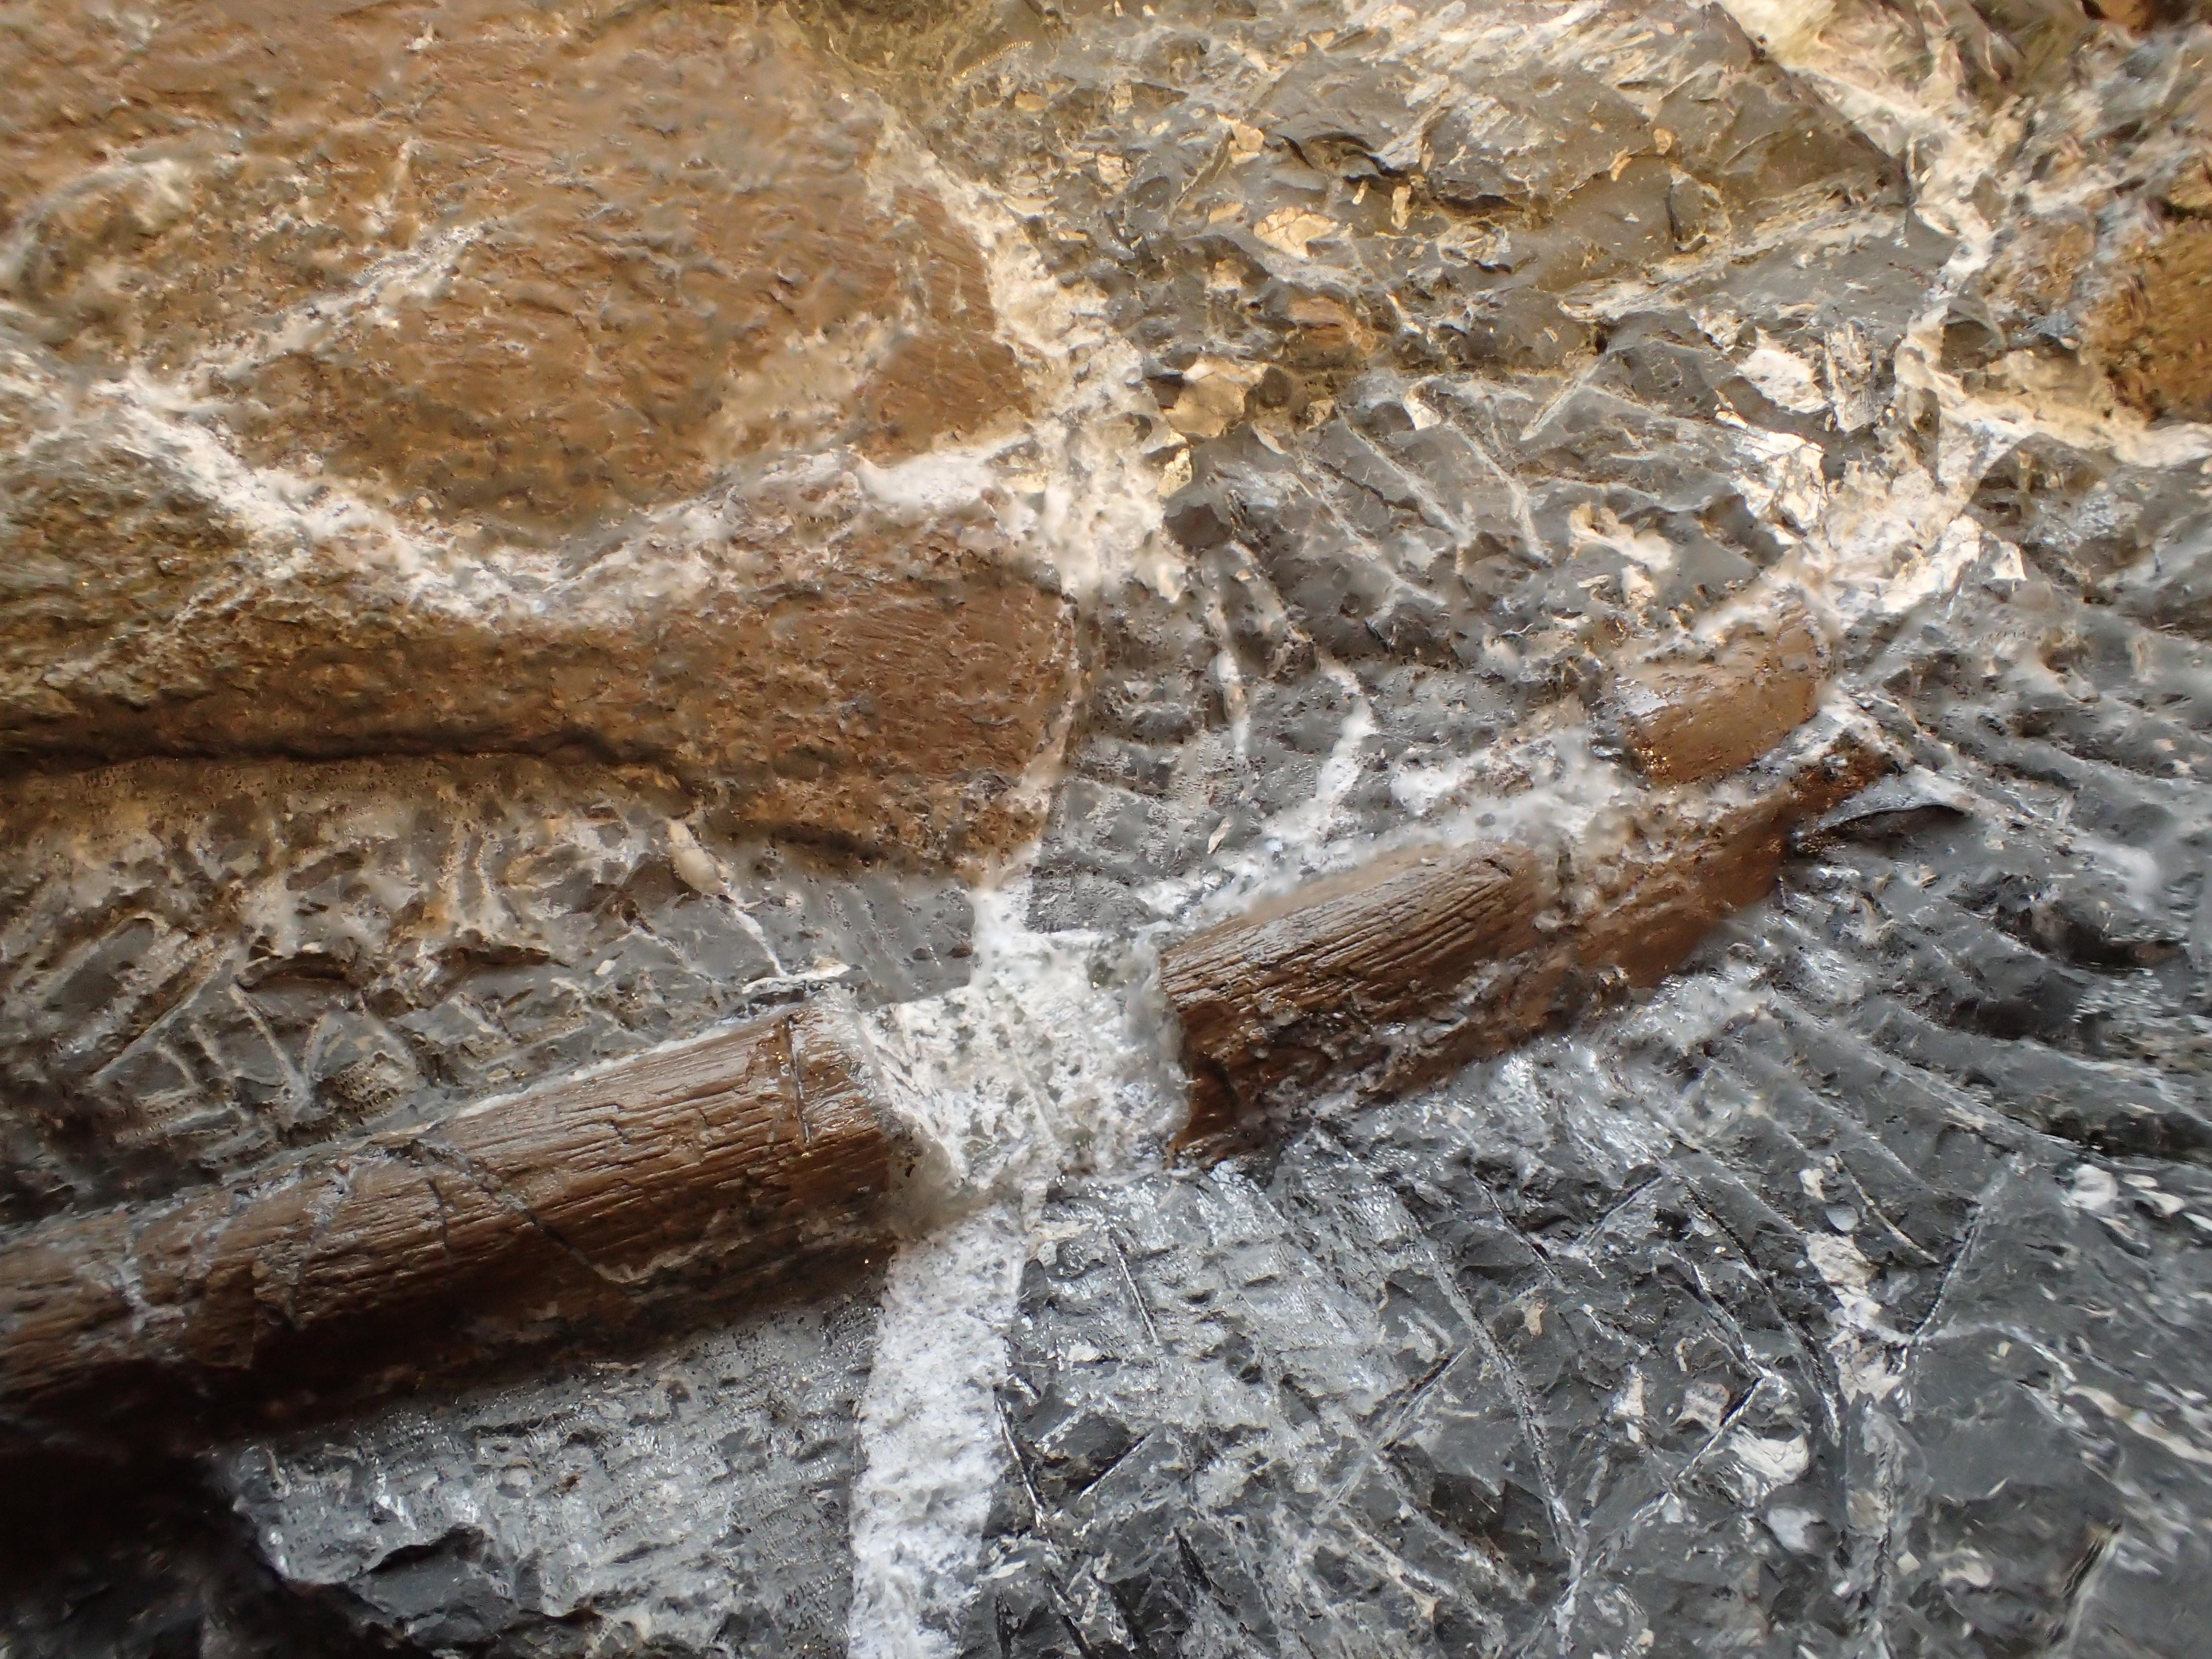
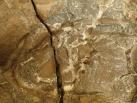
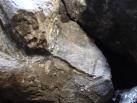
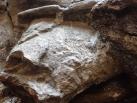
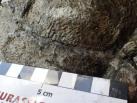
The nodule is riddled with veins filled with calcite. I have always assumed that this is because the nodule fractures after it has fully mineralised and that calcite grows in the spaces thus created. However, I have found bone in some of the calcite veins, which couldn't happen if the fracturing occurred after the nodule was mineralised.
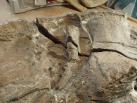
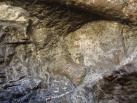
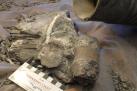
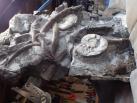
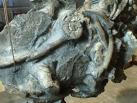
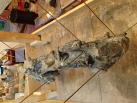
The coracoid is revaling itself, and it looks as if it stretches across the full width of the nodule. It is crushed in places.
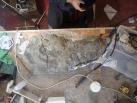
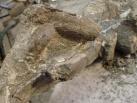
Progress
17th October 2017
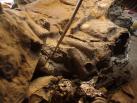
More slow progress today.The coracoid is more exposed. There are fragments of bone all over the place, especially in the calcitic veins.
Progress
18th October 2017
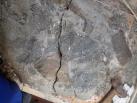
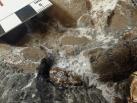
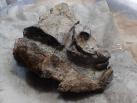
As the coracoid and other bones appear, it is clear that the specimen has been crushed and fragmented either by taphonomic processes or from predation
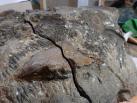
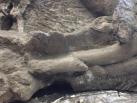
Progress
19th October 2017
The bone surface on some parts of the coracoid is very rough. It has become clear that the calcitic veins in the nodule correspond to framentation of bone.
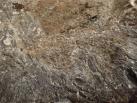
Progress
21st October 2017
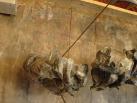
Intensive work on Block B revaling more details of fragmentation of the bones
Progress
22nd October 2017
I removed Block A temporarily to give better access to bones on the broken face of Block B.
A bit more ...
23rd October 2017
Not much progress today - only an hour or so, and getting very frustrated with how fragile the bone fragments are. I've used liberal application of paraloid in an attempt to hold them together which I can remove later with acetone, but I'm still losing the odd flake. I need to think about this.
Slow progress
23rd January 2018
Progress still occurred although I have been very remiss in recording. In part this is due to problems with my camera but that is a poor excuse.


Back to work
7th June 2018
A bit of a hiatus again because of significant discoveries elsewhere and shortage of time
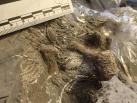
Preparing the underside of Block B
12th November 2018
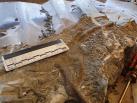
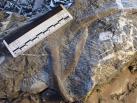
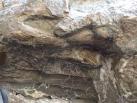
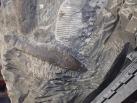
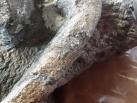
I turned over the block because it was clear that there were many more bones on the underside. A rather odd-looking bone turned out to be a rather abberant rib, not a skull bone as I hoped. Exposing the ribs involves removing a considerable depth of matrix, which has to be done very carefully as there may be more bones not showing on the surface.
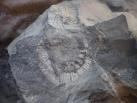
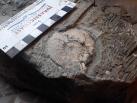
Two rather fine ammonites are exposed, leading to a bit of a dilema: do I prepare them carefully, or dig through them to see if there are any bones underneath? I've left them in place for the time being.
Working on the underside
4th February 2019
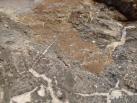
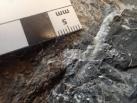
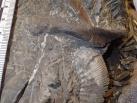
There are calcite veins running through the block and I have preserved some of them. They contain small fragments of bone which have migrated into the veins when they were in a semi-liquid state
More details
6th February 2019
Mode details of calcite veining and associated bone
Details of ammonite
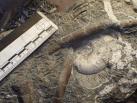
12th February 2019
One of the ammonites exposed on the underside retains an almost complete bofy chamber
Some notes on progress and preparation
10th March 2019
The way in which I have been preparing the specimen has changed over the time I've been working on it, in part because the nature of the preparation has changed as the stresses in the blocks are released, and in part because I'm learning new methods as I go along.
I was using mainly one of Ken Mannion's TT pens, but have now added a grinder to my arsenal (AG Grinder). Because it operates on a much lower pressure than the TT pen I am using it with the TN pen which also operates at 3 bar rather than the 6 bar of the TT. I've also had to replace my compressor with a larger and more powerful one as the old one burned out through constant use. The required some reorganisation of the workshop to make space.
I'm still using the dremel with a diamond cutter to remove bulk matrix by cutting parallel lines then penning out the slivers of matrix.
Both grinding and cutting generate a lot of fine dust, and I use a vaccuum cleaner as well as the extraction system as I work to get rid of as much of it as possible, and a good filter mask.
More ammonites
17th April 2019
Ammonites exposed on the underside of block A

Getting there
16th May 2019
I have been rather poor at updating the blog and taking photos of the work, but by now the underside of the specimen is mostly prepared - at least in a preliminary way. I'm now at the stage of assembling the blocks so that I can make a cradle for the upper side so that I can flip it over and finish the prep on the underside.
Back to work
3rd May 2020
I've been rather neglecting to add to this blog for a while for personal reasons and because I have had some other projects to work on. Working on this specimen is rather demanding, and it was nice to work on something much less challenging for a while - even if what looked less challenging turned out to be a bit of a headache. I haven't neglected the beast completely and have spent a few hours here and there working through the blocks.
Another reason to hold off is that I have been trying to work out how best to mount it. Much of the interest lies in the taphonomic history of the carcase which can be seen only if both can be seen. I'll be exploring ways of suspending it in a frame.
In the meantime the work is to give finishing touches to enhance the contrast between bone and other elements in the nodule. I did most of the final preparation with ZOIC TR and MR pens, which are extremely good.
Once that was done, I carefully cleaned each block by flooding it in acetone, using a soft brush to work it into all the cracks and crevices and blotted it using kitchen paper. Next stage is light airbrasion of the bone surfaces for a final clean, then coating them in 25% paraloid in acetone to stabilise the surface. It looks good as well.
Assembling the nodule
5th May 2020
I decided to glue as much as the nodule together as possible rather than trying to suspend each section separately. Because the nodule was so highly stressed, the fragments have distorted slightly and don't fit cleanly together. I used a paste of glass microbeads bound with a 50% paraloid/acetone solution as a gap-filling adhesive.
Each join takes about 24 hours to set srongly enough to be handled, so this is somthing to be done a bit at a time.
I found that old pole elastic (anglers will know what I mean) is excellent for holding sections together while the adhesive is setting. It is soft and won't harm the specimen, and tension can be graduallyu increased by additional windings of the elastic.

Joining the blocks
7th May 2020
Last bit before getting on with the mount. Blocks glueing. Sorry for the images tllted on their side. I need to figure out how to make them display correctly.
9th May 2020
9th May 2020
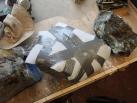
The glue is well set, so I've laid the main blocks which are now all joined togther back on the sand-tray. There is a bit of matrix to be removed and some tidying up of rougher bits.
There are cracks running through the matrix and bone in a number of places because of the way the parts have distorted as the internal stress was relieved, and because some of the calcitic infill has disintegrated. I've used a paste of paraloid and glass beads to fill the cracks. This is partly for cosmetic purposes, but more importantly that it reduces the opportunity for water to get into the pyritic material.
Preparing for mounting
23rd May 2020
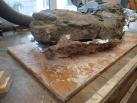
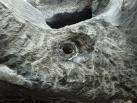
There is a lot to see on both sides of the specimen, and for this reason I had decided to mount it by suspending it is a frame or off an armature. This involves drilling holes through parts where there is no bone present, and which are hard and strong to avoid cracking of the blocks. I experimented using a large chunk of the matrix removed at an early stage of preparation.
Drilling with a conventional masonry drill proved to be completely ineffective. For obvious reasons I couldn't use the hammer drill setting. Because the nodule is so pyritic it is very hard, and ten minutes of drilling made hardly any impression and blunted the drill tip. I invested in a set of diamond tipped drill bits which cut relatively easily, if slowly.
Running wires or cables through the matrix without any other protective layer would impose high point loads, and this is something to avoid. For this reason, I drilled holes of about 8mm diameter and glued into them short sections of metal tube (formerly part of the frame of a bivouac), then inserted pvc tubing which fits tightly into the tube. This will cushion and spread any sudden load, greatly reducing the chance of breakage.
Preparing for mounting
25th May 2020
Some details of the mounting process.
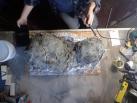
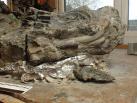
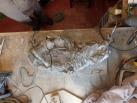
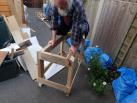
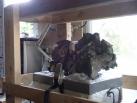
After driling mounting holes in the last block I made a sand box to support the specimen for the mounting process. To establish the geometry of the mount I built a temporay structure using old roof timbers and palette wood, strong enough to take my weight. The specimen weighs in total 35kg.
Mounting the Specimen
26th May 2020
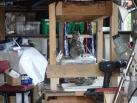
The temporary frame built and tested.
I used stainless steel wire (designed for MIG welding), and threaded rig tube (used to cover line when fishing for carp) over it to protect the bone. This was tensioned and fixed to the frame.
My initial idea was to use fishing trace wire, but having tested several different types couldn't find one strong enough, and which could be fixed robustly. Titanium wire, used to pike trace, would be ideal as it is thin and strong, but is very difficult to fix.
Mounting the last block
31st May 2020
Getting the last block in place is a tricky business. It needs to be aligned carefully with the main block. I made a small sandbox and set the block at the correct angle to fit into place, then used wooden wedges for fine adjustment of height.

Richard Forrest, 31st May 2020